About grading schemas
Doesn't seem familiar? Jump to the "Ultra" help about grading schemas.
In the Grade Center, when an item is graded, a numeric score appears in the students' cells by default. You can choose to display grades in other ways with grading schemas. A schema takes the points scored on an item and compares it to the item's total points possible to derive a percentage. This percentage is mapped to a range of scores and displays a grade, such as a letter (A, B, C) or Pass/Fail. This information is presented in a table format.
The Grade Center includes a copy of a default grading schema based on assigning letters to the percentages. Your institution may edit this schema to reflect a general grading schema used for all courses. The grade schema is based on raw scores that are assigned, and may differ from the rounded-up grades shown in the Grade Center grid.
You can associate the default grading schema with one or more columns in the Grade Center. When you grade items, the grade values (letters) appear in the cells in the Grade Center grid and to students in My Grades. You can choose not to show grades to students when creating or editing a column.
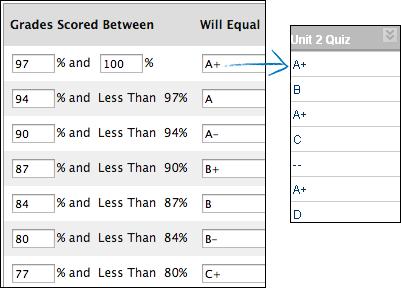
You can make the uppermost value in a grading schema greater than 100%. For example, if a student earns 100% or more, you can assign A+ to those scores.
After creation, a grading schema is included as an option in the Primary and Secondary Display menus when you create and edit columns in the Grade Center.
More on the display menus
Schema examples
Letter grading schema: For a quiz, a student's raw numeric score is 88 out of 100 points possible. In a grading schema in which a percentage of 87 to less than 90 equals a B+, a student's score of 88 results in a B+. In the quiz's Grade Center column, a B+ appears. If you release the column's grades to students, letter grades appear in My Grades.
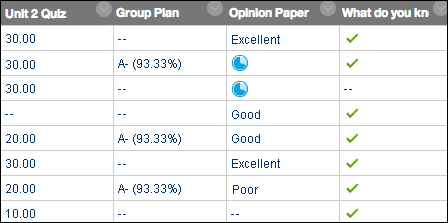
Text grading schema: For an assignment, a student's raw numeric score is 78 out of 100 points possible. You create a grading schema based on text terms, such as Excellent, Very Good, Good, Fair, and Poor. A student's score of 78 results in Good. In the quiz's Grade Center column, the term Good appears. If you release the column's grades to students, the text terms appear in My Grades.
Test curve grading schema: You create a test grading schema and associate it with all test columns. You require at least 94% for an A. But, for one particular test, you want to make an adjustment because of low scores. You can associate another custom grading schema with that test column to reflect a curve you want to apply to those lower scores. In this test curve schema, an A can equal grades scored between 90% and 100%. You can create as many test curve schemas as you want and associate them with the appropriate columns.
Create grading schemas
Doesn't seem familiar? Jump to the "Ultra" help about the letter grade schema.
More on creating grading schemas with JAWS
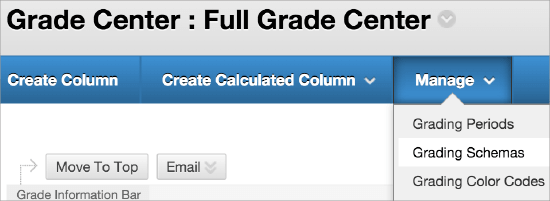
- In the Grade Center, access the Manage menu and select Grading Schemas.
- On the Grading Schemas page, select Create Grading Schema and provide a name and an optional description. The name appears on the Grading Schemas page and in the menus for Primary Display and Secondary Display when you create or edit columns.
- In the Schema Mapping section, two default rows appear with ranges of percentages. You can edit the two ranges to customize a Pass/Fail schema.
Example: Pass/Fail
| Grades Scored Between |
Will Equal |
Grades Manually Entered As |
Will Calculate As |
| 50% and 100% |
Pass |
Pass |
75% |
| 0% and less than 50% |
Fail |
Fail |
25% |
You can create other types of grading schemas with these options:
- In the Will Equal boxes, type the grade values:
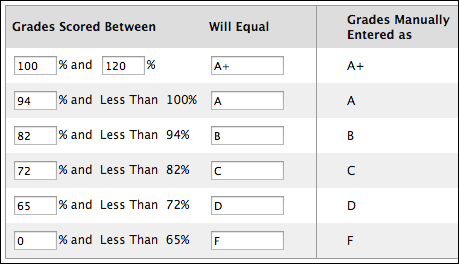
- In the Will Calculate As boxes, type the percentage values to use if you provide a grade manually. The percentages must fall between the corresponding range of percentages in the first column. For example, grades you score manually as A (90 - 100%) will be calculated as 95%. For an item with 100 points possible, if you change the grading schema from letter grades to numeric scores, 95 appears as the grade in the cell instead of A.
- Select Submit.
Edit grading schemas
Doesn't seem familiar? Jump to the "Ultra" help about editing grading schemas.
You can edit an existing grading schema and save the changes within your course. For example, you can lower the percentages needed to achieve the letter grades. New schemas and edits to existing schemas only appear in the course you are in.
If you want to retain the default grading schema, you can copy it and edit the values. Your institution may edit this schema to reflect a general grading schema they want instructors to use.
If your institution makes changes after you edit the default grading schema, your institution's changes aren't reflected in your course.
When you edit a schema, start from the top and edit the values for the first grade value and move to the next row. Then, delete or insert rows. If you navigate to another course area before you save a grading schema, any unsaved changes are lost.
If you associate a grading schema with columns in the Grade Center and edit the schema, the changes appear automatically. For example, you can edit a text grading schema and change Excellent to Superior.
Copy and delete grading schemas
You can copy and delete existing grading schemas in the Grade Center. For example, if you want to make minor changes to the default letter grading schema, you can retain it by copying it and editing it. On the Grading Schemas page, access a schema's menu and select Copy or Delete.
A copied schema appears in the list with a number appended to the name, such as Letter (2).
You can delete the default letter grading schema only if you haven't associated it with a Grade Center column. If no letter grading schema exists, Letter isn't an option in the Primary or Secondary Display menus.
If no check box exists for a schema, you have associated it with a Grade Center column and can't delete it.
Associate grading schemas
When you create or edit grade columns, you can select a grading schema in the Primary and Secondary Display menus. The schema you select as the Primary Display is the grade value in the Grade Center and what students see in My Grades. The Secondary Display appears in parentheses only in the Grade Center, next to the Primary Display. Students don't see the secondary value.
- Access the appropriate column's menu and select Edit Column Information.
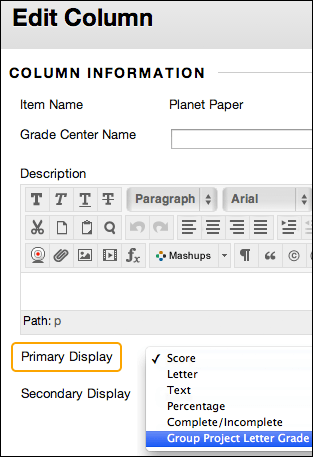
- On the Edit Column page, make a selection in the Primary Display menu. If you created customized grading schemas, they appear in the list. Five default options appear:
- Score: A numeric grade is the default setting. If you don't make a selection, the score appears in the grid.
- Letter: A letter grade appears. The default grading schema is used to assign letter grades. For example, a score of 21/30 equals 70% and appears as a C.
- Text: Text appears in the column when you create and associate a text grading schema. Examples of text values include: Excellent, Very Good, Good, Fair, and Poor -OR- Satisfactory and Unsatisfactory. If no text grading schema exists, and you select the Text option, you can type text in the column's cells. If you choose to share the column results with students in My Grades, they see the text values for their grades.
When you convert a numeric score to text without creating a custom text grading schema, and then return to numeric scoring, values that can't be converted display a zero after conversion. If you want to include text as grades, We recommend that you create a text grading schema and associate it with the appropriate columns.
- Percentage: A percentage appears. For example, a score of 21/30 equals 70%.
- Complete/Incomplete: When a student submits an item, a Completed icon appears in the column regardless of the score achieved.
- Optionally, make a selection in the Secondary Display menu. The default setting is None. The same options appear in this list with the exception of the option chosen as the Primary Display and Text. The default Text option doesn't appear for grade columns as you can't edit a secondary value from a grade column's cell.
For self-assessments, you can't define a Secondary Display because the Primary Display is Complete/Incomplete.
- Select Submit.
In the Grade Center grid, you see the chosen grade displays. If you don't choose a grade display for a column, only the default score appears.
Contact Us
Chat with Tech Support Submit a Ticket Call 701-777-2222