How to select a tool to link
You can link to a tool, such as the main Blogs page — or link directly to a specific instance of that tool, like a blog entry. You can also link to the overall 'Tools' area, so that students can access a list of all of the tools available in your course.
- Log in to Blackboard, and open the desired course. Make sure that 'Edit Mode' is ON so that you can access all of the instructor's functions.
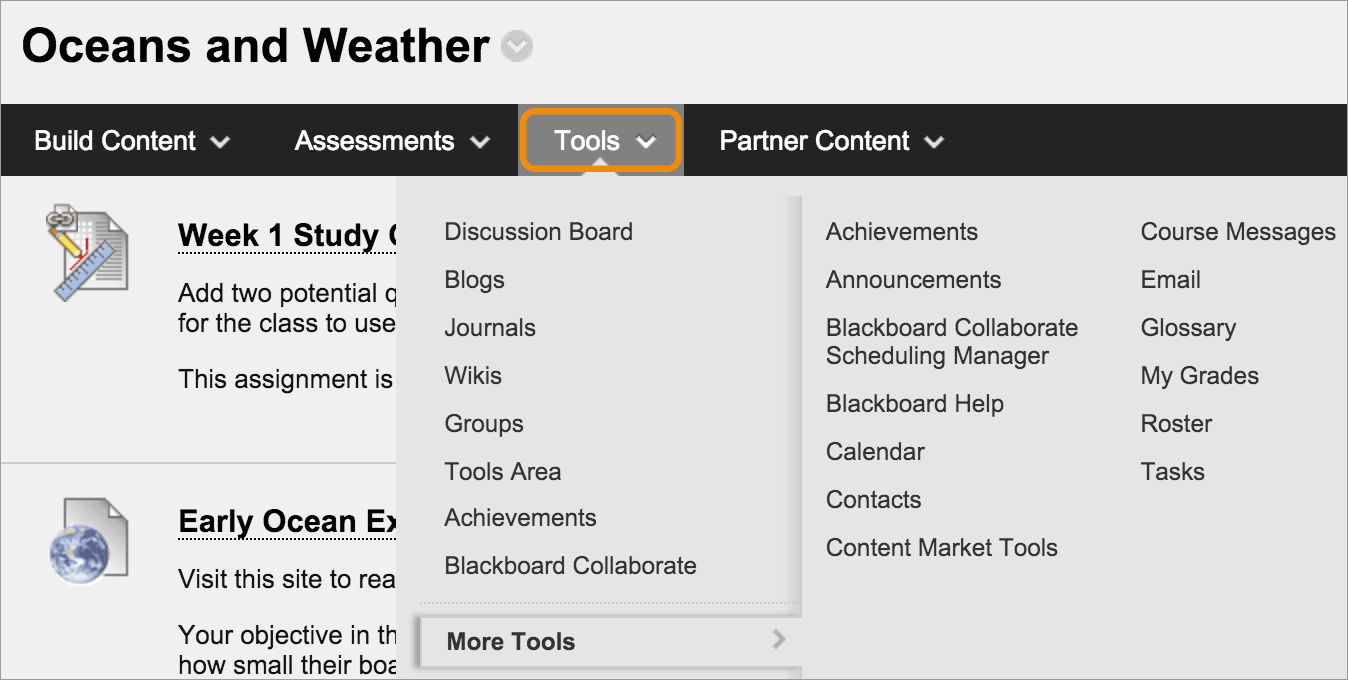
- In any content area, learning module, lesson plan, or folder: select Tools, then and click the desired tool. You may need to select More Tools to show or hide additional items.

Example: How to create a Blog link
These steps detail how to create a blog link, but the steps are similar for the other tools.

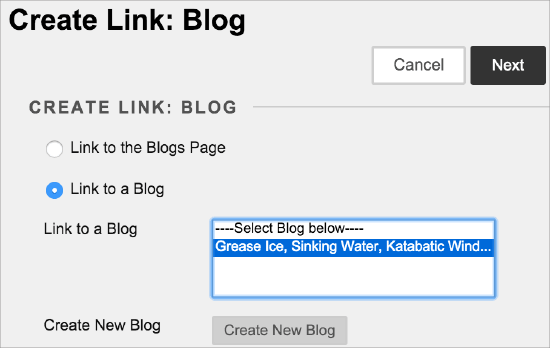
On the Create Link: Blog page, select one of the following:
- Link to the Blogs Page - link to the page where all blogs appear.
- Link to a Blog - select a specific blog from the list, and link to it directly.
- Create New Blog - add a link to a blog you create at this time. On the Create Blog page, type a name and select settings for the new blog. After you submit, the newly created blog appears in the list of blogs to choose from.
Select Next. On the Create Link page, type a name and an optional description. Select the appropriate options for availability, tracking, and display dates. Display dates don't affect a tool link's availability, only when it appears.
After you submit, the tool link will appear in your course's content area. You can change the content at any time; access the tool drop-down menu, and select Edit.

You can change where the tool link appears in the content area with the drag-and-drop function, or by using the keyboard-accessible reordering tool.
Contact Us
Chat with Tech Support Submit a Ticket Call 701-777-2222