DocuSign is a secure, paperless alternative for official document signatures. Digital document signatures help reduce the carbon footprint by reducing the amount of paper required, plus it is faster than snail mail and eliminates the hassle of finding a fax machine. DocuSign makes keeping copies as easy as saving on your computer, and it can be used on any device.
Info! All UND students, faculty, and staff have a DocuSign account by default, and accounts do not need to be manually created by the user.
Log in to Docusign Sign a Docusign Send a Docusign

Log in to Docusign
- Go to Docusign.com and click Log In in the upper right of the page.
- Use your @UND.edu email address and then click Continue.
- You will be taken to the NDUS login page, where you enter your user.name and password (only user.name, not your full email address).

Back to Top
Sign a Docusign
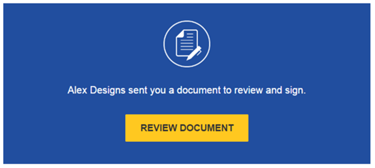
When someone sends you a DocuSign document for your electronic signature, you first receive an email from DocuSign sent on behalf of the sender.
- Review the DocuSign email: Open the email and review the message from the sender. Click REVIEW DOCUMENT to begin the signing process.
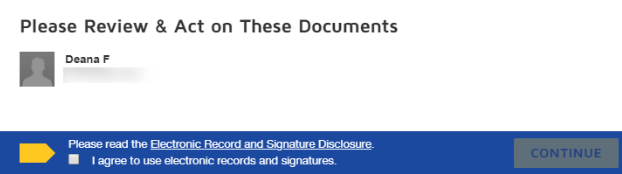
- Agree to sign electronically: Review the consumer disclosure, and select the checkbox I agree to use Electronic Records and Signatures. Click CONTINUE to begin the signing process.
- Start the signing process: Click the START tag on the left to begin the signing process. You are taken to the first tag requiring your action.

- Click the SIGN tag.
- You are asked to Adopt Your Signature.
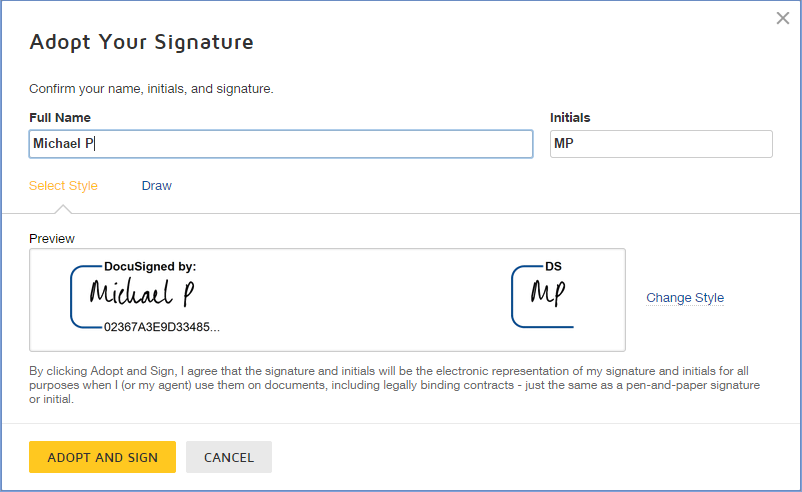
- Verify your name: Verify that your name and initials are correct. If not, change them as needed.
- Adopt a signature.
- Click ADOPT AND SIGN to adopt and save your signature information and return to the document.
- Confirm signing: When you finish clicking all signature tags in the document, confirm signing by clicking FINISH. A message appears stating that you have completed your document. You can now download a PDF copy or print a copy of the document. The sender receives an email with the signed document attached, and the signed document appears in their DocuSign account.
Back to Top
Send a Docusign
The basic steps for creating and sending a document for signature are as follows:
- Start an envelope. You can start with a new envelope, use a template stored in DocuSign eSignature, or finish a previously saved draft.
- Add your documents. DocuSign eSignature supports a broad variety of file formats. Select files from your local machine or from cloud storage providers like Google Drive or Dropbox.
- Add recipients. Specify who receives your envelope and what action you want them to take.
- Add messages. Enter the email subject and message details for your recipients.
- Advanced Options. Set special recipient privileges, reminder settings, and expiration options.
- Add fields. For each recipient, add fields to your documents to gather the desired electronic signatures and other information, such as title, date signed, and more.
- Preview and send. Review your field setup and send the envelope to your recipients.
Back to Top