About files and multimedia
You can add files, images, audio, and video when you create content in your course. For example, in discussions, you can browse for a media clip from your computer or your course's file repository: Course Files or the Content Collection.
More on Course Files
More on the Content Collection
Based on the content type, you can use the functions in the editor to embed content in your text. You have creative control over how your content appears and the flexibility to change the order and appearance when you want.
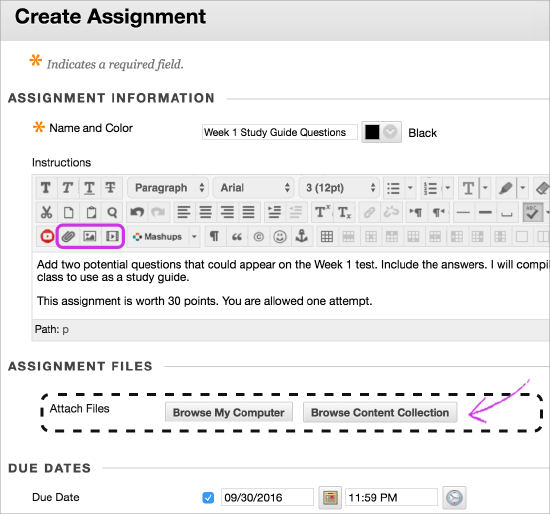
In some instances, you can browse for files in a separate attachment section. You may also be able to drag and drop files from your computer into the Attachments area. Drag files from your computer to the "hot spot" in the Attach Files area. If your browser allows, you can also drag a folder of files. The files will upload individually. If the browser doesn't allow you to submit after you upload a folder, select Do not attach in the folder's row to remove it. You can drag the files individually and submit again.
You can also add social media from other websites to your content. These social media elements that appear in a course are called "mashups." A mashup combines elements from two or more sources. For example, when you view a YouTube™ video as part of the course content, you are experiencing a mashup.
More on mashups
Or, use the Build Content menu to embed multimedia as standalone items in the content list.

Add files to your content
Wherever you can attach files in your course, you can browse for files from your computer or your course's file repository: Course Files or the Content Collection.
When you use the Insert File function in the editor, you can determine exactly where the file's link appears within your content. When you use the Attachments section, the file you uploaded appears immediately after the title of the content item.
More on methods for adding files
The Browse Course and Browse Content Collection windows include tabs and functions so that you can browse and search for files easily.

- Browse, Upload, and Advanced Search tabs:
- Browse for folders you have access to. If you have Course Files, you only have access to the files for the course you are in. With the Content Collection, you may be able to access files for other courses and those shared institution-wide.
- Upload one file, multiple files, or a zipped package.
- Perform an advanced search. You can search file and folder names, metadata, file contents, date created, and more.
- View List and View Thumbnails: View files and folders as a list of file names or as thumbnail icons.
- Breadcrumbs: Navigate to other folders. Use the Select to use the current folder location icon to link the folder that appears last in the breadcrumbs in your course. Note that the folder appears in the Select Items area.
- Search Content: Perform a basic search for file and folder names.
- Use the check boxes to select files and folders to include in your content item. You can select the header check box to select all visible items. When you link to a folder, use caution as students receive the read permission by default on all of the folder's contents. Read permission allows students to view all the files and sub-folders in the selected folder.
- Select Items: The files and folders you select appear in this area. Select the Show List icon to view your selections. To remove an item, select the X.
Upload content from Dropbox
If your institution has enabled the Dropbox Education integration, you and your students can link directly to your Dropbox content with the Blackboard Learn mashup tool available in most content areas. Students can also upload files directly from their Dropbox when they submit assignments.
When you access Dropbox Education the first time from Blackboard Learn, you'll be prompted to either create an account or authenticate to your current account. After you log in, browse Dropbox and select the appropriate content.
Add images in the editor
Doesn't seem familiar? Jump to the "Ultra" help about adding images in the editor.

When you create content, you can determine where images appear in relation to your text. Select the Insert/Edit Image icon to embed an image in the text area or edit an existing selected image. Alternatively, embed or edit an image with the right-click menu. You can also resize an image you already added in the text area. Press and drag an image's corners or sides.
You can browse for image files from your computer or your course's file repository: Course Files or the Content Collection.
You can add the common image types, such as GIF, JPG, JPEG, BMP, PNG, and TIF.
If you don't want the image to appear embedded in your text, select the Insert File icon. Browse for the image file and create a link that students select to view the image in another window or tab.
Image settings
On the General tab, you can upload an image file or create a link to a file outside of the system. To create the link, type or paste a URL in the Image URL box. You must use the http:// protocol.
You can add alternative text that describes the image for people who use screen readers or visit web pages with images turned off. You can also add a title that appears when a student points to an image.
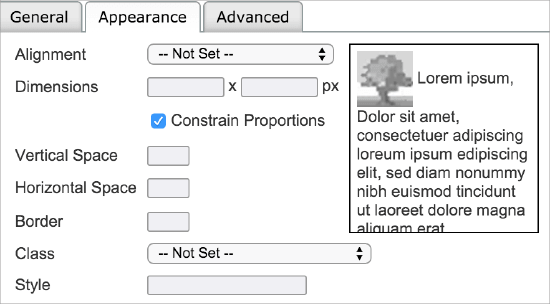
On the Appearance tab, you can control image placement and appearance. A sample thumbnail shows how your choices will appear. Pixels are used for dimensions, space, and the border. If you select the check box for Constrain Proportions and change the dimensions, the image is resized without horizontal or vertical distortion.
If you want your image to appear right or left of a block of text, type your text in the editor first. Then, move your cursor to the beginning of the text and insert your image there. After you add your image in the General tab, move to the Appearance tab to choose your alignment, dimensions, and space around the image.
On the Advanced tab, you can specify an alternative image based on mouse activity. You can also set additional identification, language, and link parameters. Normally, you don't need to set or change these settings.
Add images in the Build Content menu
You can embed an image so that it appears as a standalone piece of content in the content list.
In a content area, learning module, lesson plan, or folder, select Build Content to access the menu and select Image. Type a name, optional description, and alternative text. Select the appropriate options for dimensions, availability, tracking, and display dates. Display dates don't affect an image's availability, only when it appears.
Browse for an image file from your computer or your course's file repository: Course Files or the Content Collection. If the Mashups function is available, you can also browse for a Flickr photo. You can preview the image before you submit.
After you submit, the title and image appear in the content list. You can change the content at any time. Access the image's menu and select Edit.
You can change where the item appears in the list with the drag-and-drop function or the keyboard accessible reordering tool.
Add audio and media files in the editor
Doesn't seem familiar? Jump to the "Ultra" help about adding media files in the editor.
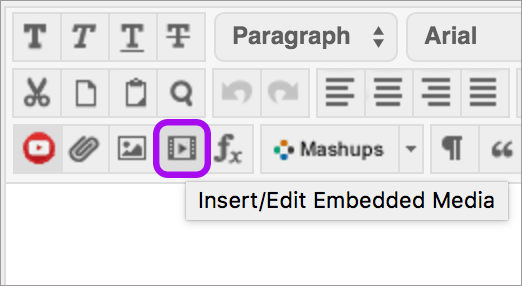
When you create content, you can determine where media clips appear in relation to your text. Select the Insert/Edit Embedded Media icon to embed a media clip in the text area or edit an existing selected media item. You can also use the right-click menu to edit the properties of an existing selected media clip.
If you don't want the media clip to appear embedded in your text, select the Insert File icon. Browse for the media file and create a link that students select to view the media in another window or tab.
Blackboard Learn supports these media file types:
- Audio: AIFF, MP3, MIDI, MP, WAV, and WMA
- Video: ASF, AVI, MOV, MOOV, MPG, MPEG, QT, SWA, SWF, and WMV
Media settings
From the menu, select the type of media you want to add. You can upload a media file or create a link to a file outside of the system. To create the link, type or paste a URL in the File/URL box. You must use the http:// protocol. The video appears for your preview.
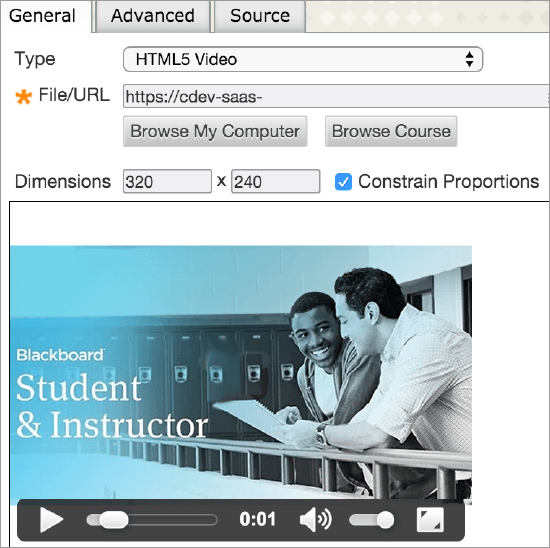
For the dimensions, you can add a size displayed in pixels. If not set, the actual size populates the boxes.
If you select the check box for Constrain Proportions and add a measurement, the file is resized without horizontal or vertical distortion. You can preview the file in the window.
On the Advanced tab, you can set advanced display parameters. For example, you can set the V-Space and H-Space-the vertical and horizontal margins for space around the embedded media.
You can also set options specific to Flash media only, including these:
- Auto Play: Plays automatically
- Loop: Replays automatically
On the Source tab, you can provide custom media HTML code. This feature is intended for advanced web developers.
Add audio and video in the Build Content menu
You can embed audio and video so that they appear as standalone pieces of content in the content list.
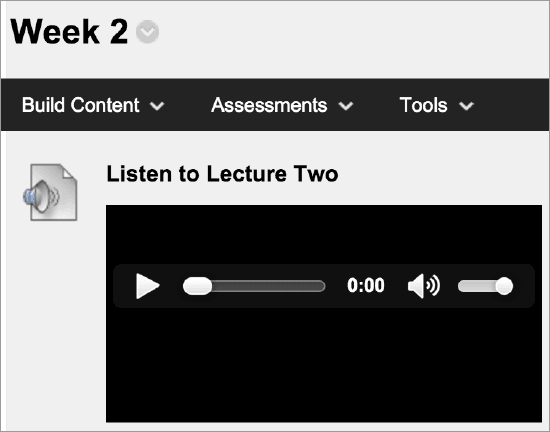
In a content area, learning module, lesson plan, or folder, select Build Content to access the menu and select Audio or Video. Type a name, optional description, and select the appropriate options for dimensions, availability, tracking, and display dates. Display dates don't affect the media's availability, only when it appears.
Browse for an audio or video file from your computer or your course's file repository: Course Files or the Content Collection. If the Mashups function is available, you can also browse for a YouTube video. You can preview the media clip before you submit.
We recommend that you include a transcript so that students who can't hear are able to receive the same information. Browse your computer to attach your own transcript file. If the video file is an MPEG file, you can use the Include Transcript field to attach an SAMI transcript file.
After you submit, the title, transcript, and media clip appear in the content list. You can change the content at any time. Access the item's menu and select Edit.
You can change where the media clip appears in the list with the drag-and-drop function or the keyboard accessible reordering tool.
If a video file type isn't supported and doesn't appear embedded, students can download the file to watch it.
Contact Us
Chat with Tech Support Submit a Ticket Call 701-777-2222